
Inside: How to make an easy DIY Valentine’s Day heart wreath photo frame craft for your loved ones this Valentine’s Day.
Are you looking for the perfect gift to give your loved ones this Valentine’s Day? Why not make this DIY Valentine’s Day heart wreath photo frame!
This craft is super easy to make and in this tutorial I even encourage you to get the kids involved!
After you finish this craft, you can use it as a cute Valentine’s Day decoration in your house. Or, give if as a gift to those special someones in your life!
Keep reading to learn how to make this easy Valentine’s Day craft!
*This site may contain affiliate links. To real the full disclosure, click here.

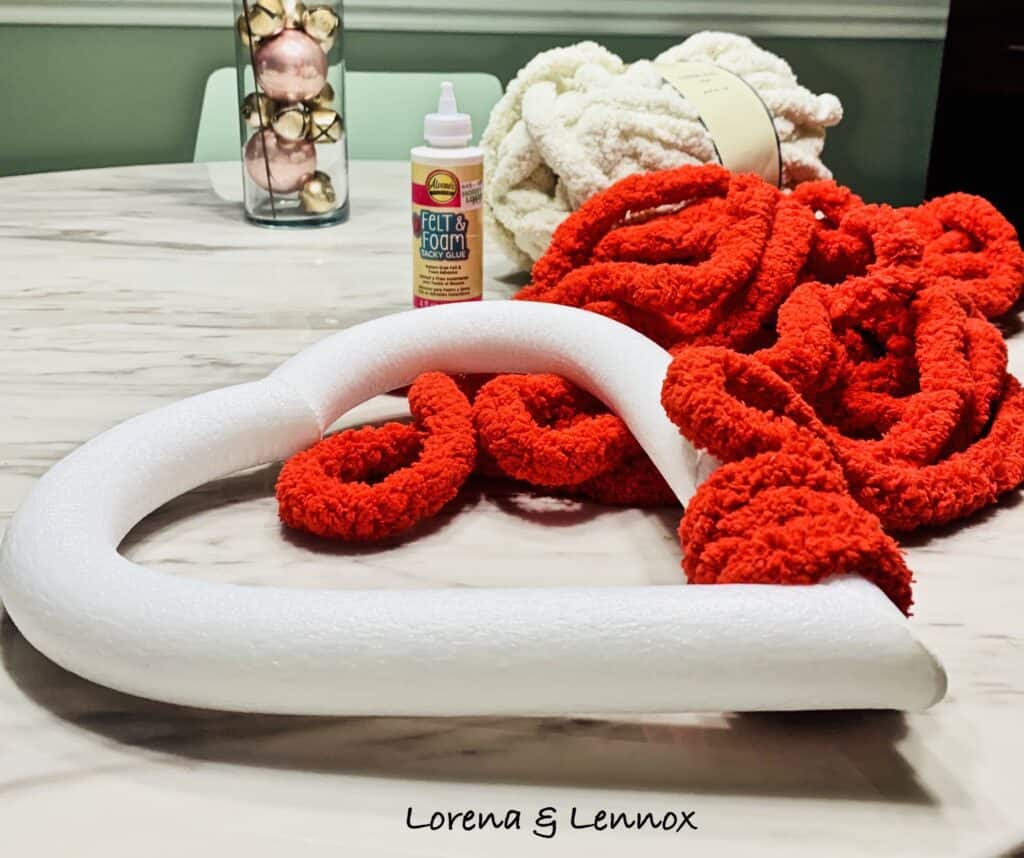
What you will need to make this Valentine’s Day Heart Wreath Photo Frame
- 8.5” and/or 12” Styrofoam Hearts
- Antique Yarn Bee Tocco di Lana Yarn
- Any color of your choosing. I decided to go with Red and White.
- Cardstock
- Felt & Foam Glue
- Scissors
- Tape and/or Elmer’s Glue Stick
- Heart Sequins
- ¼” Pom Poms
Instructions:
Step one: prepare the yarn, and pick a place to start
Pick a spot on the heart where you want to begin and tie a knot around the styrofoam heart.
Then, roll out your yarn, and—depending on the size of your heart (I cut off five ft for my 12” heart, and three for my 8.5’) cut off a 3-5 foot strip. This yarn is wooly and luscious, so don’t feel worried about cutting it too short or long. If you need to add more, it blends in very beautifully.
With that being said, definitely cut off a strip of yarn unless you want to bear the hassle of squeezing a soccer-sized yarn ball through your styrofoam heart the entire process. Also, if you have a child helping you with the craft, they are going to think it’s an actual ball and get totally distracted from your activity.
Once you cut your yarn, take the end of the yarn (not the side knotted to the styrofoam heart) and roll it around your hand into a smaller ball for easier maneuvering during your wrapping process.
Step two: If you are doing this craft with your child, let them explore
After I let Lennox “wrap” his heart to his little heart’s finest, I finished them myself for a “Pinterested” finish.
*Side note: If doing this activity with your child, it is so important not to push a perfect expectation.
What I have learned most in Lennox’s preschool, and loose parts play is that expecting unmeasurable outcomes, or outcomes at all, interferes with a child’s creativity.
Now aware of this interference, I allowed Lennox to explore the textures of the yarn and practice his fine motor skills through the weaving and wrapping of the yarn. Once he lost interest, I continued on to step three.
Step three: Wrap your heart
Apply two-inch lines of the Felt & Foam Glue up/down —on the inside and outside of the heart—the section of the heart your are wrapping. Wrap your yarn neatly around the styrofoam heart. Repeat until you get to the middle points and bottom points.
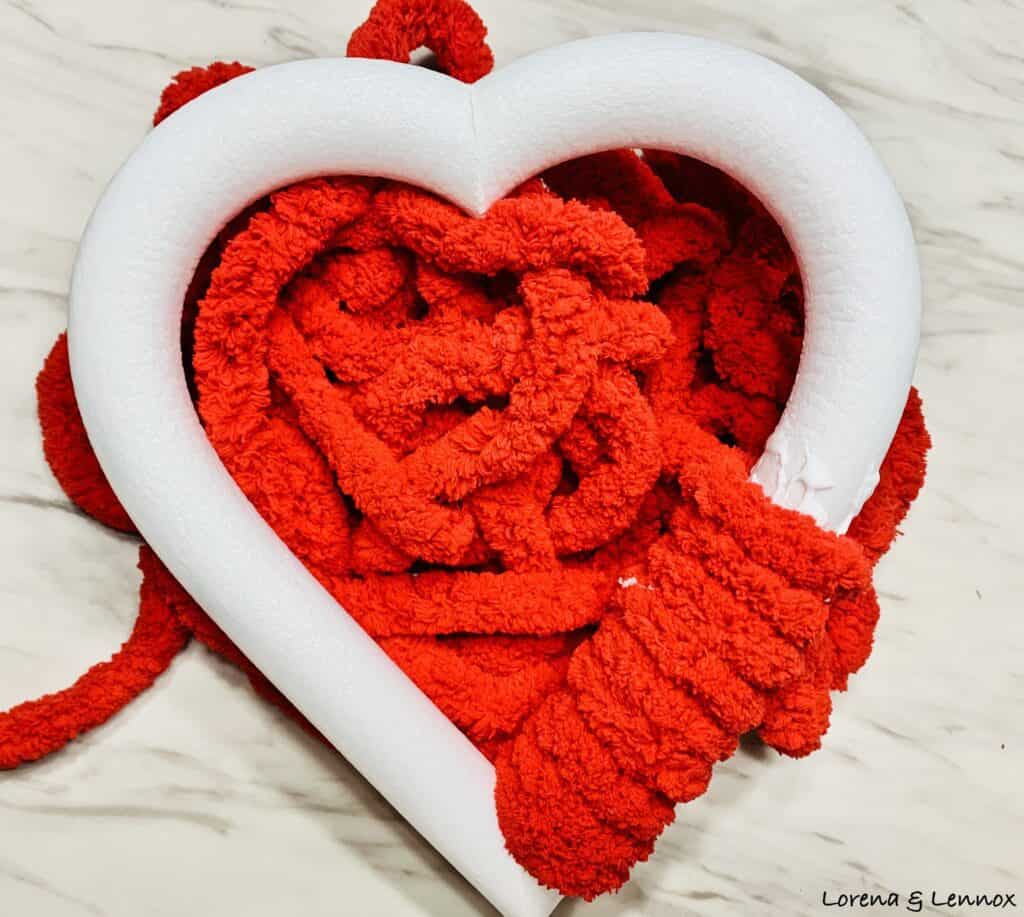
Once you get to the middle and bottom of the heart, apply extra glue to make sure the yarn stays in place. It takes about an hour for the glue to set. After you finish, if there are spots of the styrofoam heart not covered, cut small pieces of yarn and patch them in with the glue. As I mentioned earlier, they will fit right in.
*If you yarn gets glue in an unwanted area, no frets. We will be glamming it up shortly.
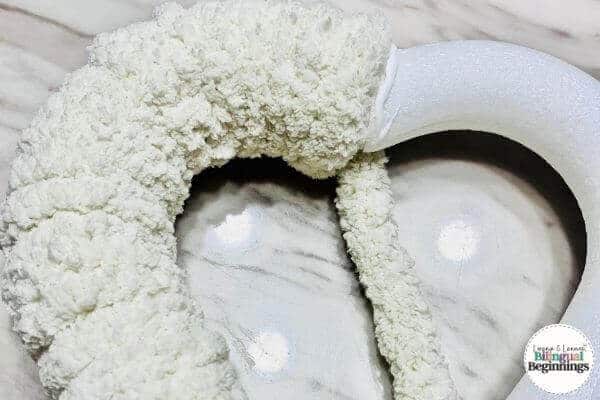
At the bottom point of the heart, make sure to use extra glue to hold the yarn in place. It will require some patching at the end, which I recommend over my technique of wrapping too many times, as you can see below.
Regardless, if you wrap too many times, or if you patch, you will be adding glitz on top so it will mask the bulkiness.
I don’t know about you, but I love, love, love the look of this beautiful wool yarn. I can’t wait to explore with it even more.
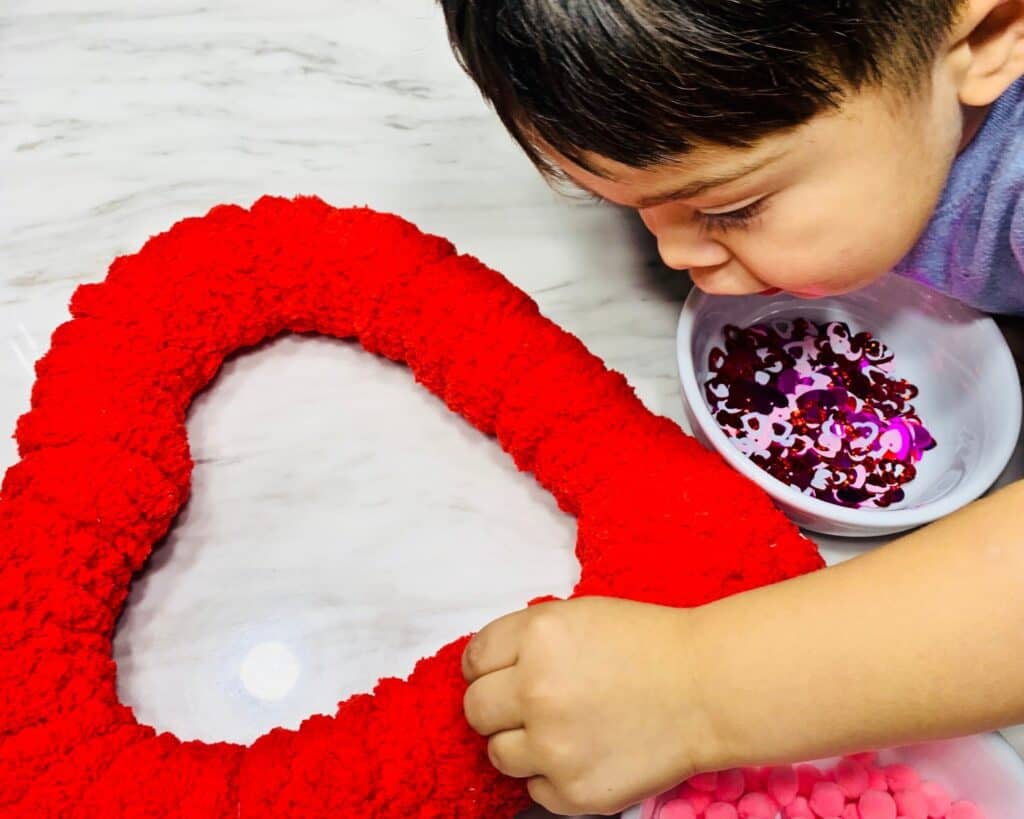
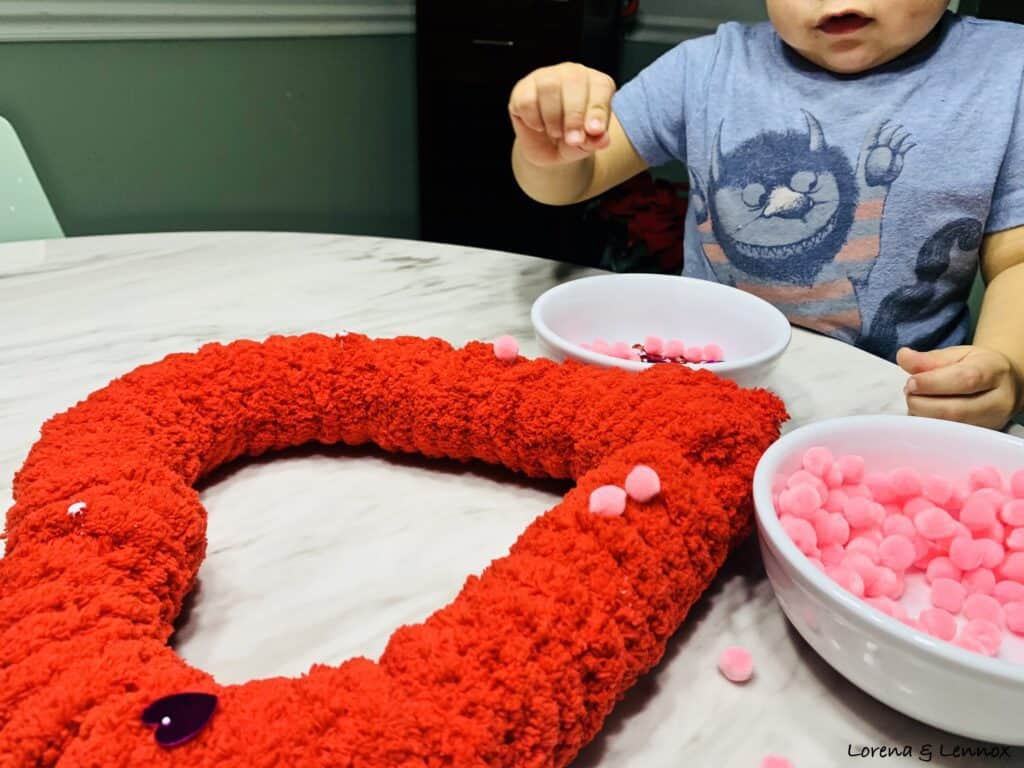
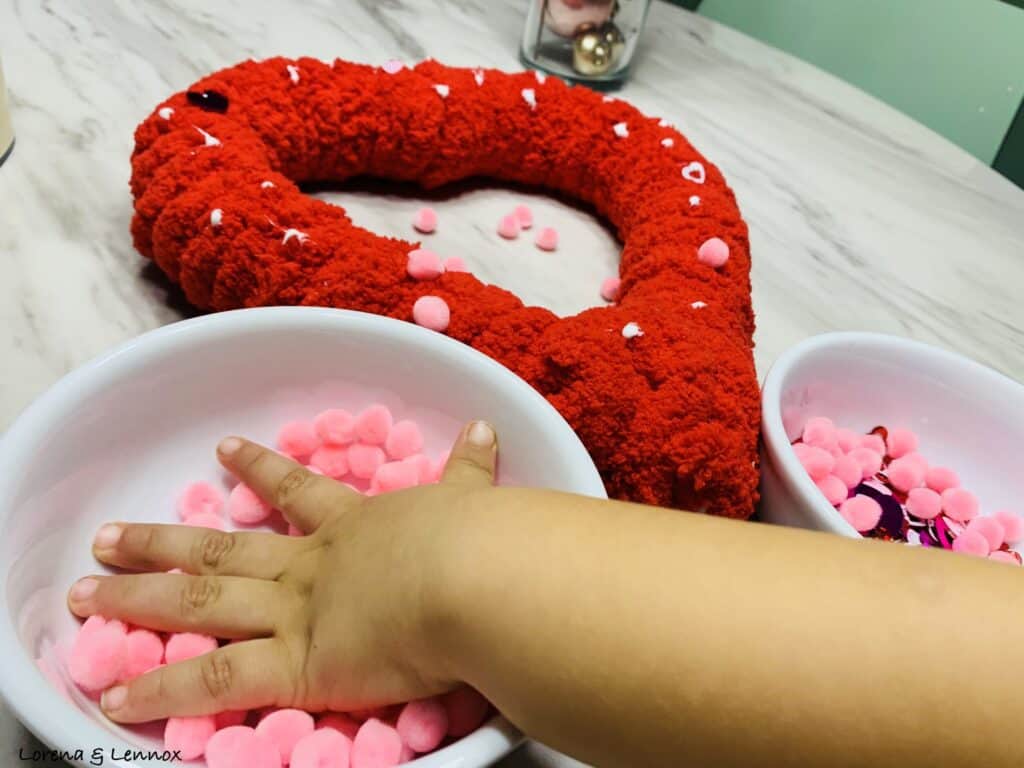
Step four: Glam it up
This was Lennox’s favorite part, because we have done this before in previous crafts.
What I do, is place dots of the Felt & Foam Glue all over the heart, and allow Lennox to place the decorations on the spots.
Step five: Let your heart dry for a few hours.
I let mine sit overnight so that the yarn, sequins and pom poms could become best friends. However, after a couple of hours, your heart should be ready for step six.
Step six: Make the backing for your collage
I took two pieces of card stock and laid them on the backside of the heart. I traced the outer edges of the heart to ensure that I had enough room to attach it.
Then, I cut it out with scissors and double-checked that I traced it correctly and with enough room to attach it to the back of the heart wreath.
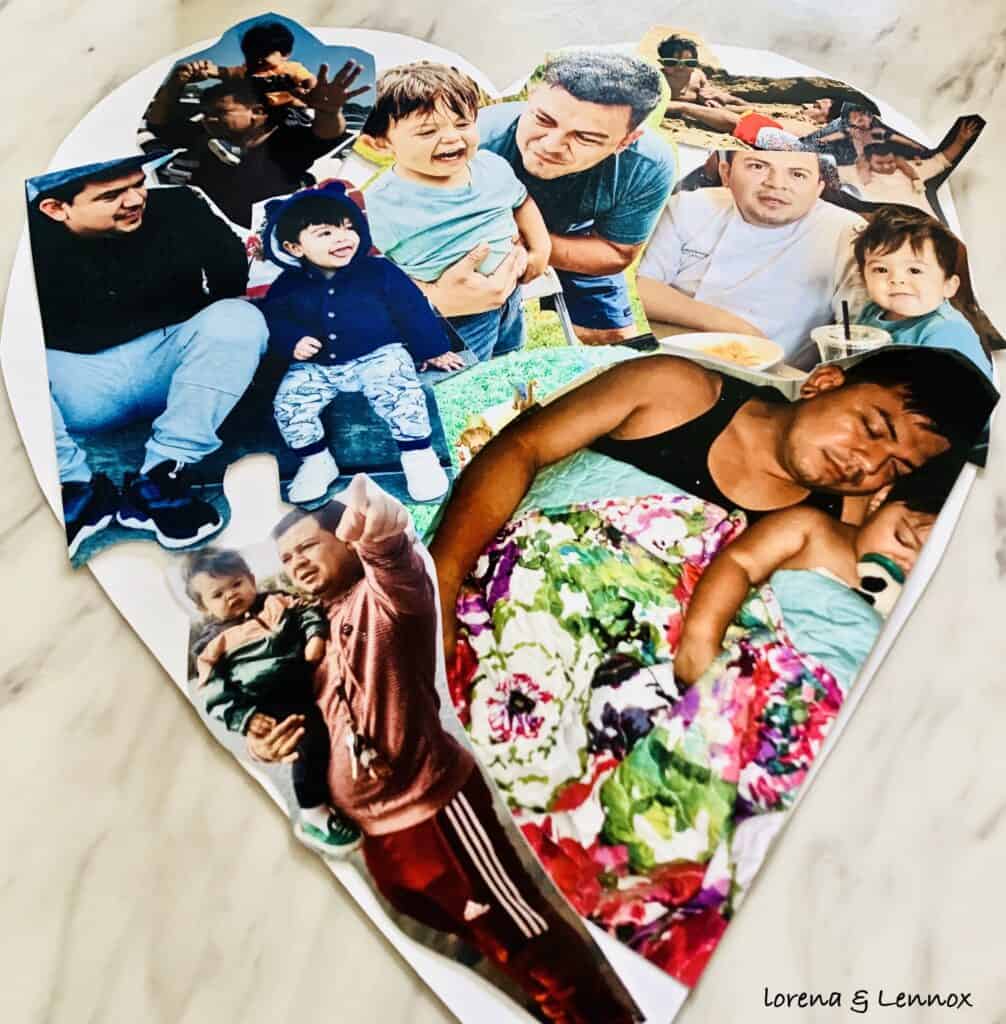
Step seven: Pick out photos and collage them
Lennox and I went through our photo collection and picked out pictures with Carlos and him. Then, during his nap time (I don’t like doing things with sharp scissors around him), I cut out their images and collaged them on the cut-out hearts.
* Don’t make my mistake and try to collage to the outer edges of the hearts. The wool yarn takes up a lot of the visual, so don’t worry about covering the entirety of the heart’s surface. As you can see in the final result, some of my pictures are hard to see. Luckily I did this craft a month and a half early so I can fix it!!!!
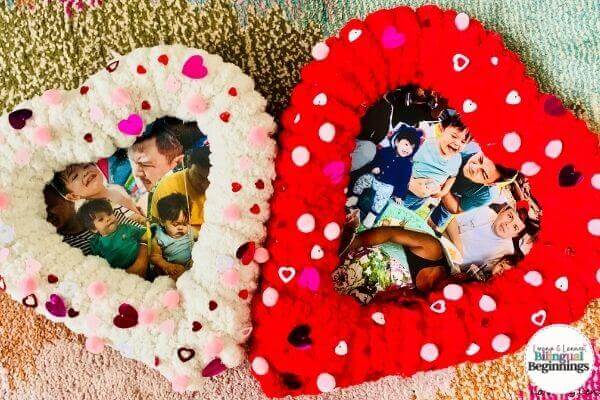
Step eight: Attach your collaged cardstock to the heart wreath.
Last but not least, using the Felt & Foam Glue, trace the outer edges of the heart. If you are worried about ruining your pictures, try to apply the glue only onto the cardstock. If you have duplicated or can print, don’t worry about the glue getting on your photos. Once you have outlined the majority of the heart, attach it carefully to the heart wreath.
There you have it, a beautiful DIY Heart Wreath Photo Collage.
Not only have you created a beautiful product, but you got your kiddos involved. Whoever is on the receiving side of this gift will be more than honored. So much more thought goes into DIY gifts over store-bought gifts, all while creating wonderful family memories.
I hope you enjoyed this craft! Don’t forget to comment below with your thoughts, and/or questions or concerns. In the meantime, enjoy this silly, but adorable picture of Lennox very happy with his work!
Other Valentine’s Day posts you might enjoy:
- 9 Easy Valentine’s Day Sensory Activities and Crafts for Toddlers
- 25 Valentine’s Day Sensory and Fine Motor Activities for Preschoolers
- 20 Free Valentine’s Day Printable Activities for Preschoolers

Shellie Clark
Sunday 17th of January 2021
Great cute craft that the family can do!!
Lorena Ruprecht
Friday 22nd of January 2021
Thank you, Shellie. I hope you enjoy the heart wreath photo craft with your family :)
Angel |Mommy-ing Differently
Wednesday 1st of January 2020
This us such a cute and fun little craft!
Lorena Ruprecht
Wednesday 1st of January 2020
Thank you, Angel. We had a fun time making it.
Amy
Monday 30th of December 2019
So cute and perfect for the younger kids.
Lorena Ruprecht
Wednesday 1st of January 2020
It really is. The think yarn is great for little hands.